Tag Archive | tiling a shower
Lessons Learned: Bathroom Reno

Here are some of the biggest lessons we learned when doing our bathroom renovation. Enjoy, Mari & Paul
Demo & Planning
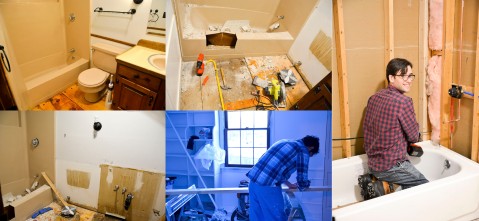
- Turn off the water to the bathroom and be careful not to nick the pipes when demolishing
- Invest in a reciprocating saw (aka Sawzall), especially if you have a fiberglass tub/surround to cut up
- Wear long sleeves, a mask, and eye protection during demo, again, especially if you are dealing with fiberglass and/or popcorn texture
- Enlist the help of friends!
Installing Backerboard/Cementboard
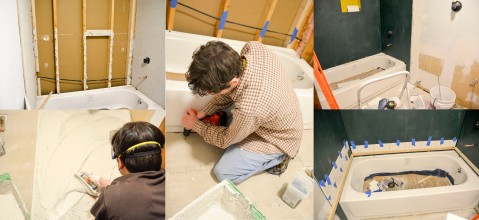
- You don’t need to use that much thin set/mortar under your backerboard/cementboard
- Mix small batches of thin set/mortar at a time so you don’t waste it (that goes for grout, too) and use warm water to make it easier
- You don’t necessarily need thick board – opt for a 1/4 inch if you can to make install easier
- Predrill the holes in your board if you’re having trouble installing it
- If you are not using a waterproof barrier underneath the board then you should paint a waterproof membrane on top of it (the green stuff)
Tiling the Surround
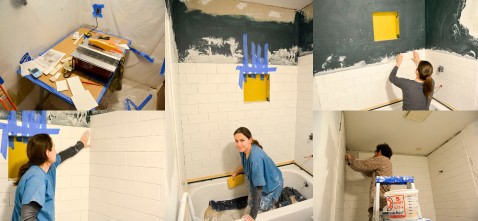
- Plan out your tile pattern before starting and determine the best placement for your shower niche if you are including one
- If installing a niche – consider buying a plastic one instead of building it yourself and screw it directly into the studs
- Invest in a GOOD tile saw (ours was not and it caused many headaches)
- Keep your area clean and wipe down tiles as you install – don’t wait until later when the mortar hardens
- Wear gloves! I didn’t and my hands suffered for it
Grouting the Surround
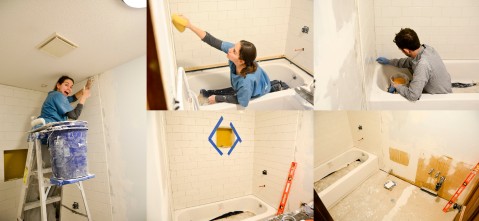
- Wear gloves for this part, too!
- Sponge down the tiles as you are grouting, again, don’t wait until later when it will be much more difficult (we know from experience on this one)
- Cure the grout by spraying it with water twice a day for a few days
- Seal after curing – it might take a few passes with the sealer
Tiling the Floor

- Plan our your design and start with the most important/visible area – in our case we wanted to control the look of the tiles abutting the tub
- Clean as you go
- You can reuse spacers as each area dries
- Use knee pads – they really do help!
- Cure and seal as you see fit
Installing the Vanity & Fixtures

- Enlist the help of a professional – in our case we hired a plumber to install the tub and fixtures
- Make sure your vanity and toilet and tub are the correct distance from one another according to code in your area
Installing the Toilet

- Read the manual for installing your toilet ahead of time
- If you opt for an apron type toilet (see above) know that it will be a more challenging install
- Invest in a GOOD diamond bit to drill through your tile – we broke several economy diamond bits and would have been better served with buying the expensive one off the bat


